

Are you a dancer who wants to sew your own pointe shoes? Or maybe you’re just curious about the process. Either way, this guide will walk you through the steps of sewing pointe shoes.

Sewing pointe shoes is essential for ballet dancers, ensuring a personalized fit and optimal performance. Properly sewn shoes provide the necessary support, stability, and comfort to perform intricate movements precisely. While the process may seem daunting at first, mastering this technique allows dancers to tailor their shoes to their individual needs, enhancing both their confidence and artistry.
This guide on how to sew pointe shoes will walk you through the steps to sew your pointe shoes effectively, so you can focus on perfecting your dance. Let’s get started!
What Are the Benefits of Sewing Your Own Pointe Shoes?
Sewing your own pointe shoes offers several benefits, both for the dancer and the shoes themselves.
- Personalized Fit: Every dancer’s feet are unique, and so is their pointe shoe fit. Sewing your own shoes allows you to customize them to fit your specific foot shape and size. This ensures a comfortable and secure fit, reducing the risk of blisters or injuries.
- Longer Lifespan: Pointe shoes can be expensive, so it’s essential to make them last as long as possible. By sewing them yourself, you can reinforce weak spots or repair any damage quickly and easily, extending the lifespan of your shoes.
- Better Performance: Sewing your shoes allows you to tailor the stiffness and strength of the shoe to your preference. This can improve your performance, giving you more control over your movements and balance.
- Sustainable Practice: As a dancer, you go through many pairs of pointe shoes throughout your career. By sewing them yourself, you can reduce waste and promote sustainability within the dance community.
What Will You Need?
Before we dive into the steps of sewing pointe shoes, let’s make sure you have all the necessary materials:
- Pointe Shoes: This may seem obvious, but make sure you have a new or slightly used pair of shoes ready for sewing. Using old or worn-out shoes may result in a poor fit and decrease their lifespan.
- Sewing Kit: You will need a basic sewing kit that includes needles, thread, scissors, and pins. Having a thimble to protect your finger while sewing is also helpful.
- Darning Thread: This thread is thicker and stronger than regular sewing thread, making it ideal for reinforcing the weak spots in your pointe shoes.
- Elastic Straps: Elastic straps are essential for securing your feet in the shoe. Make sure you have enough elastic to create two straps for each shoe.
- Ribbon: Ribbon is used to wrap around the ankle and provide additional support. You will need enough ribbon to wrap around both ankles multiple times.
Once you have all the necessary materials, it’s time to start sewing your pointe shoes.
8 Easy Steps on How to Sew Pointe Shoes
Step 1: Mark the Placement of Ribbons and Elastic
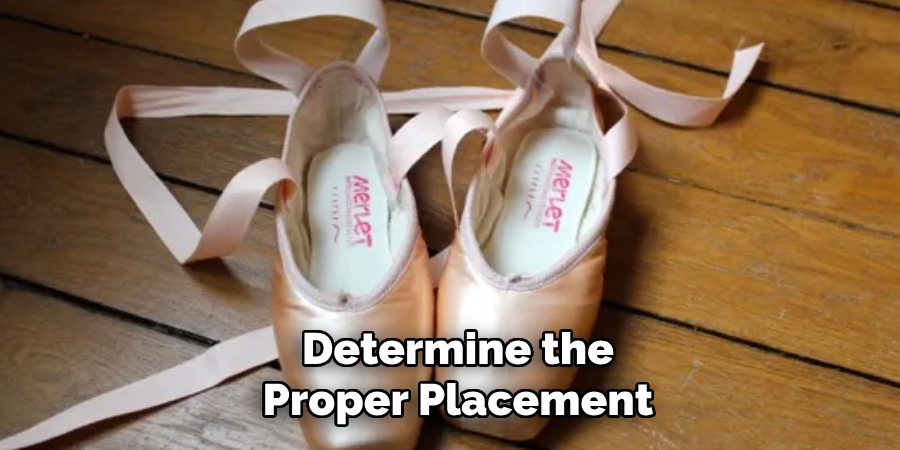
Begin by wearing your pointe shoes to determine the proper placement for the ribbons and elastic straps. The ribbons should be attached near your foot’s arch, at the shoe’s strongest part. Use a pencil or pin to mark the inside edge of the shoe where the ribbons will be sewn. For elastic straps, position them near the heel on either side of the shoe, ensuring a snug fit that keeps the shoe secure without causing discomfort. Proper placement is crucial to providing the necessary support while dancing.
Step 2: Cut and Prepare the Ribbons and Elastic
Measure and cut the ribbons and elastic straps to the appropriate lengths. Each ribbon should be long enough to wrap around your ankle twice and tie securely, typically around 22-24 inches each. The elastic straps should be cut to fit snugly around your heel without being overly tight. After cutting, use a lighter or match to gently singe the cut edges of the ribbon to prevent fraying. This preparation step ensures your materials are ready for sewing and optimal durability.
Step 3: Sew the Ribbons and Elastic
Thread a needle with a sturdy thread that matches the color of your pointe shoes. Begin by sewing one end of the ribbon onto the inside edge of the shoe where you marked earlier. Fold the edge of the ribbon slightly to prevent fraying, and stitch it securely in place using a whipstitch or backstitch. Repeat the process for the other ribbons, ensuring they are aligned symmetrically on each side of the shoe for balance.
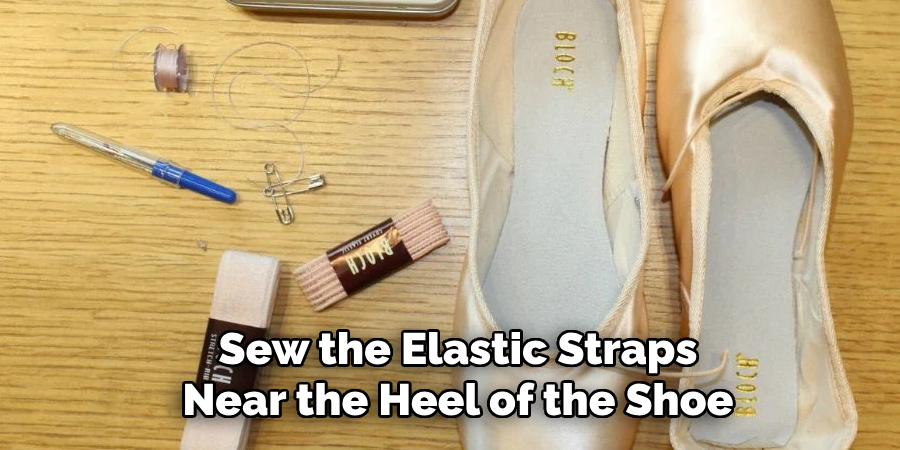
Next, sew the elastic straps near the heel of the shoe, positioning them on the inside edge as marked. Like the ribbons, fold the edges of the elastic to prevent fraying before stitching. Make several strong, tight stitches to ensure the ribbons and elastic remain secure through rigorous use. Lastly, test the placement of the ribbons and elastic by trying on the shoes and adjusting if necessary before completing the stitching.
Step 4: Add a Darning Stitch
Darning stitch is a type of embroidery technique used to reinforce weak spots in fabric. It helps prevent the shoe from breaking at the arch, which is a common issue for dancers. Using darning thread and a needle, sew a few rows of darning stitches around the arch area on both shoes. This extra layer of support will help your pointe shoes withstand intense use.
Step 5: Sew the Drawstring
The drawstring is a crucial component of your pointe shoes, as it ensures a snug and comfortable fit while dancing. Begin by threading the drawstring through the casing at the top edge of the shoe. Often, the drawstring is already partially threaded, but if it has come loose, use a small safety pin to help guide it through the channel.
Once the drawstring is fully threaded, pull it gently and evenly on both sides to gather the material and tighten the shoe around your foot. Be careful not to overtighten, as this can cause discomfort or restrict circulation.
Step 6: Attach the Ribbons
Ribbons are essential for securing your pointe shoes to your feet and providing stability while dancing. To attach the ribbons, cut two pieces of ribbon, each approximately 22 inches long. Fold the end of one ribbon about half an inch and securely sew it to the inside of the shoe, just above the arch. The ribbon should be angled slightly forward for a better fit.
Repeat this process for the other side of the shoe, ensuring symmetry. Once both ribbons are attached, tie them around your ankle and lower leg, ensuring they are snug but not too tight. Tuck in the ends to create a clean and polished look.
Step 7: Break in Your Pointe Shoes
Breaking in your pointe shoes is important to ensure they mold to your feet and provide proper support while dancing. Start by gently bending the shoe shank with your hands, focusing on the area under the arch to make it more flexible. Be cautious not to over-bend, as this could damage the shoe. Next, soften the box by lightly pressing on it and working the sides with your fingers.
You can also wear the shoes around the house to allow them to naturally conform to your feet. Taking the time to break in your pointe shoes will make them more comfortable and significantly improve your dancing experience.
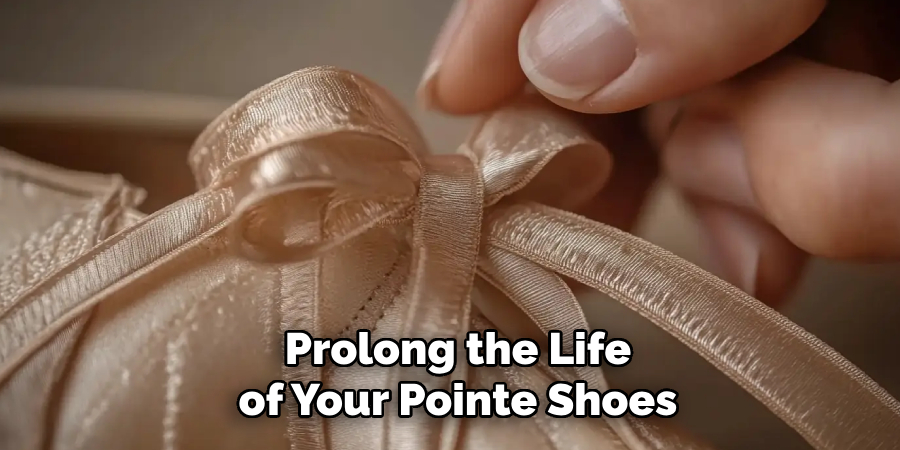
Step 8: Practice Proper Care and Maintenance
To prolong the life of your pointe shoes and maintain their performance, practicing proper care and maintenance is essential. After each use, allow your boots to air out by removing them from your dance bag and placing them in a well-ventilated area. This helps reduce moisture buildup and prevents the boots from breaking down prematurely. Avoid wearing your pointe shoes on hard surfaces outside the studio to prevent unnecessary wear and tear.
By following these steps, you can properly sew and prepare your pointe shoes for optimal performance and comfort.
5 Things You Should Avoid
- Using Thick or Improper Thread: Avoid using thick or non-suitable thread like embroidery thread or dental floss, which can create bulky stitches and prevent the ribbons or elastics from lying flat. Always use strong, yet lightweight thread designed for sewing fabrics.
- Sewing Too Close to the Drawstring Casing: Do not sew ribbons or elastics too close to the drawstring casing, as this can interfere with the drawstring’s functionality. Improper placement might also weaken the structural integrity of your pointe shoes.
- Skipping Measurements or Markings: Skipping the step of measuring and marking where to sew can result in uneven placement of ribbons and elastics. This may lead to discomfort and can negatively affect your balance and support during your dance.
- Making Stitches Too Loose or Too Tight: Avoid making stitches that are either too loose, as they won’t hold the ribbon or elastic securely, or too tight, as they may damage the shoe fabric or create unnecessary tension on the foot.
- Oversewing or Damaging the Shoe’s Box: Be careful not to sew into the box of the shoe, as this can damage its integrity and make the shoes less effective. Always keep your stitches neat and confined to the fabric lining for clean, durable results.
Conclusion
How to sew pointe shoes is an essential skill that every dancer should master to ensure proper fit, comfort, and durability.
By taking the time to carefully measure, mark, and sew your ribbons and elastics with precision, you can enhance your performance and minimize the risk of discomfort or injury. Avoid common mistakes like incorrect placement, rushed stitching, or damaging the structure of the shoe.
With patience and practice, you’ll develop the technique to prepare your pointe shoes effectively, setting the foundation for a confident and graceful performance.