
Are you tired of looking at dull and outdated shower walls? Don’t worry, you can quickly transform your shower walls with a fresh coat of paint.
Painting shower walls can be an effective way to refresh the look of your bathroom without the expense of a full renovation. However, because shower walls are frequently exposed to water and moisture, choosing the right materials and following proper preparation steps is important to ensure a long-lasting and professional-looking result.
This guide on how to paint shower walls will walk you through the process step-by-step, from selecting the appropriate paint to applying it correctly, so you can transform your shower walls with confidence and ease. Let’s get started with some basic materials you will need.
What Are the Benefits of Painting Shower Walls?
Before jumping into the steps, it’s essential to understand why painting shower walls is a great option for your bathroom.
- Cost-effective: Painting your shower walls can be an affordable alternative to a full renovation. You can achieve a new look without the high cost of retiling or installing new wall panels.
- Customization: With paint, you have endless options for colors and finishes, allowing you to create a unique and personalized look for your bathroom.
- Easy Maintenance: While tiles and other materials may require regular cleaning and maintenance, painted shower walls are relatively easy to maintain with simple wiping and occasional touch-ups.
- Versatile: Paint can be applied to various shower walls, including drywall, fiberglass, and acrylic walls.
What Will You Need?
- High-quality paint formulated explicitly for bathrooms and moisture-prone areas
- Primer designed for the type of shower wall you have (e.g. drywall, fiberglass, acrylic)
- Paint roller and tray
- Paintbrushes in various sizes
- Painter’s tape
- Drop cloths or plastic sheets to protect surrounding areas
- Sandpaper or sanding block
Once you have gathered all the necessary materials, it’s time to start preparing your shower walls for painting.
8 Easy Steps on How to Paint Shower Walls
Step 1: Clean the Shower Walls
Before painting, it’s crucial to clean the shower walls thoroughly. Begin by removing any dirt, soap scum, mildew, or grime that may have accumulated over time. Using a non-abrasive cleaner or a mixture of vinegar and water, scrub the walls with a sponge or soft cloth, focusing on areas with visible stains or buildup. A mild bleach solution can be used for tougher spots or mildew, but be sure to ventilate the bathroom well during this step.

Once the walls are clean, rinse them thoroughly with water to remove any leftover cleaning residues. Allow the walls to dry completely before moving on to the next step, as dampness can interfere with the primer and paint adhesion.
Step 2: Repair Any Damage
Inspect the walls carefully for any cracks, holes, or other imperfections needing repair. Use a putty knife to apply spackle or joint compound to small holes and cracks, ensuring the material is smoothed out evenly with the wall’s surface. For larger holes, consider using a patch kit, which typically includes a mesh patch and joint compound for a more durable repair. Once the compound has dried completely, sand the area lightly with fine-grit sandpaper until it’s smooth and level with the rest of the surface.
Pay attention to any areas where the wall may have become uneven or damaged over time, as repairing these imperfections is crucial to achieving a flawless paint job. After sanding, wipe the walls down with a damp cloth to remove dust before priming and painting. This step ensures the surface is prepared and ready to support long-lasting and professional-looking results.
Step 3: Sand the Surface
Proper sanding is essential to create a smooth foundation for your paint. When sanding, start with medium-grit sandpaper to tackle any rough patches or uneven areas, and then transition to fine-grit paper to achieve a polished finish. Be thorough but gentle, as over-sanding can damage the wall or create indentations that may show through the paint.
Pay extra attention to areas around repaired spots, edges, or corners, as these are familiar places where imperfections can stand out. Additionally, using a sanding pole for hard-to-reach areas or ceilings can make the task more efficient and ergonomic.
Step 4: Protect Surrounding Areas
Cover any fixtures, such as faucets, showerheads, and handles, with painter’s tape to prevent accidental paint splatters. Use drop cloths or plastic sheets to protect the floor and any nearby surfaces, such as vanity cabinets or countertops. Ensuring a clean workspace will make the painting process smoother and avoid unnecessary cleanup later on.
Step 5: Apply Primer
Before painting, apply a primer to the walls to create a smooth, uniform surface and ensure the paint adheres properly. Choose a primer suitable for the surface you are working on, such as drywall, plaster, or previously painted areas. Use a roller for large sections and a brush for detailed edges or corners.
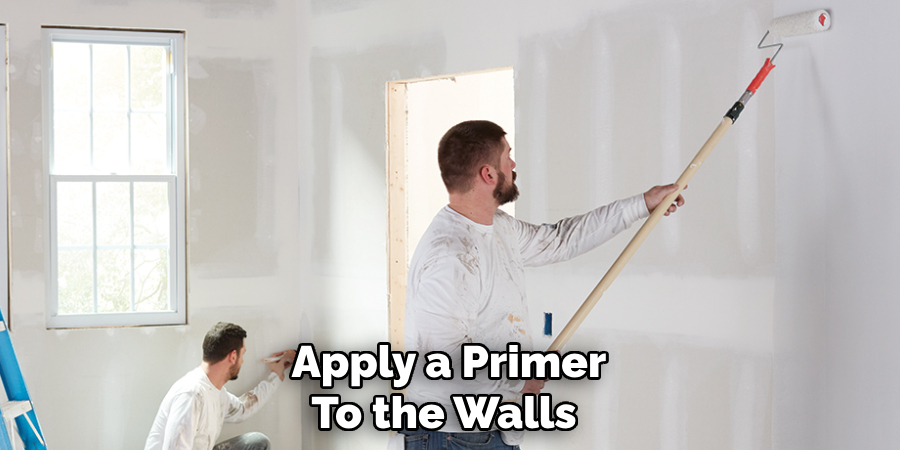
Allow the primer to dry completely according to the manufacturer’s instructions before proceeding to the next step. Skipping this step can lead to uneven color application and reduced paint durability.
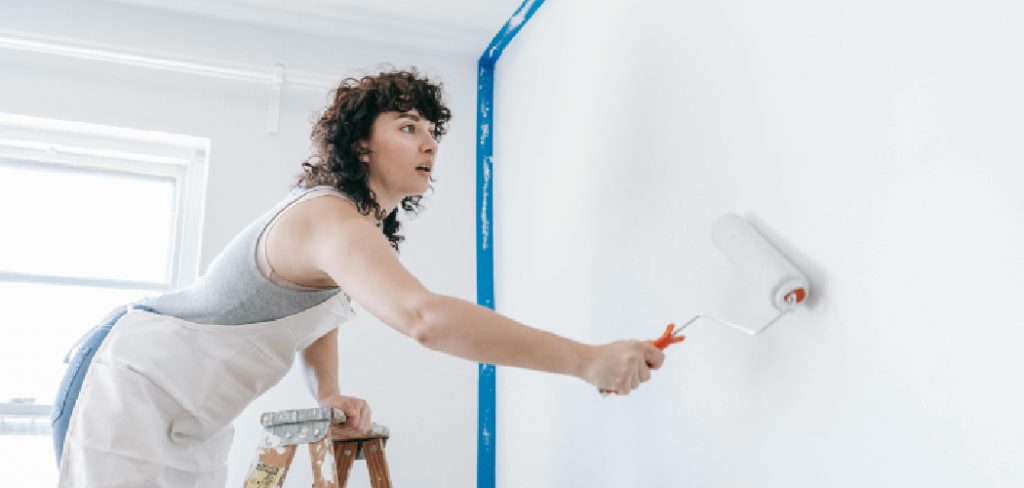
Step 6: Start Painting
Once the primer has dried, it’s time to start painting. Begin by cutting in along the edges of the walls with a brush, focusing on corners, trim, and areas around fixtures. Then, use a roller to apply paint to the larger sections of the wall, working in small sections and using even strokes for consistent coverage. Depending on the paint color and type, you may need to apply a second coat after the first one has dried completely. Be sure to follow drying time recommendations provided by the manufacturer for the best results.
Step 7: Clean Up and Inspect
After finishing the painting process, clean your brushes, rollers, and other tools promptly with the appropriate cleaning solution—either water for water-based paints or paint thinner for oil-based paints. Store leftover paint in tightly sealed containers and label them for future touch-ups. Once the room is dry and ventilated, inspect the painted surfaces for any missed spots or uneven areas and make necessary touch-ups. Proper cleanup and inspection ensure that the job is complete and the space looks polished and professional.
Step 8: Reassemble and Enjoy Your Space
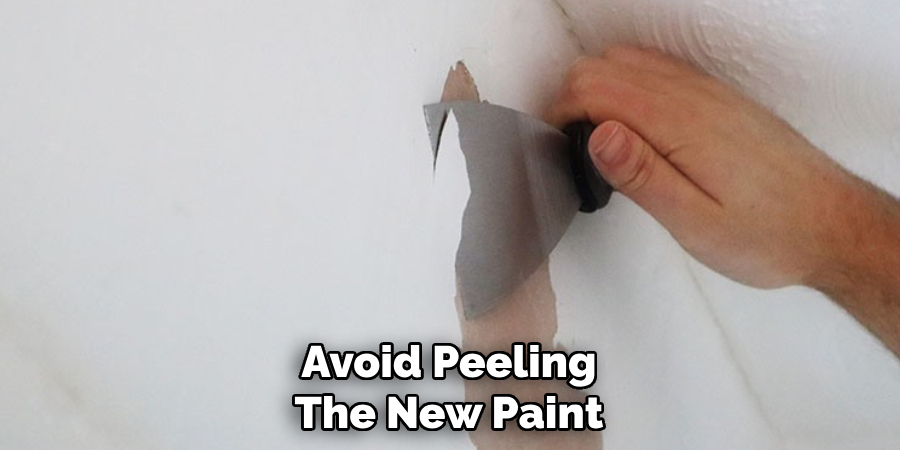
Once the paint has dried completely and any touch-ups are finalized, carefully remove any painter’s tape at a sharp angle to avoid peeling the new paint. Reinstall fixtures, switch covers, and outlet plates, then move furniture back into the room. Add any decorative elements or personal touches to bring the space to life. Step back and admire your hard work, enjoying the refreshed and revitalized atmosphere you’ve created.
By following these steps, you can transform your shower walls with a fresh coat of paint and achieve a professional-looking finish.
5 Things You Should Avoid
- Using the Wrong Type of Paint: Avoid using regular interior paint not designed to withstand moisture and humidity. Instead, opt for epoxy or waterproof paints for bathroom and shower areas.
- Skipping Surface Preparation: Do not neglect properly cleaning and sanding the shower walls before painting. Dirt, soap scum, and slick surfaces can prevent the paint from adhering correctly, leading to peeling or flaking.
- Painting Over Mold or Mildew: Never paint over mold or mildew without addressing it first. Use a mold-killing solution to clean the area thoroughly to ensure a safe and long-lasting paint job.
- Ignoring Drying Time Between Coats: Avoid rushing the process by not allowing sufficient drying time between coats of paint. Painting too soon can create uneven finishes and compromise durability.
- Forgetting to Seal the Paint: Skipping the step of sealing the paint with a waterproof sealant can result in water damage over time. Always apply a high-quality sealant to protect your painted shower walls from moisture and wear.
5 Different Design Ideas
- Bold and Bright: Add a pop of color to your shower by choosing a bold and bright paint color, such as teal or coral. This can create a fun and vibrant look in an otherwise neutral bathroom.
- Subtle and Serene: For a more calming and spa-like feel, opt for soft pastel shades like light blue or mint green. These colors help create a relaxing atmosphere in your shower space.
- Sleek and Modern: Consider using a glossy or metallic finish for an elegant and modern look in your shower. Silver or bronze tones can add sophistication to the space while also reflecting light for a brighter appearance.
- Natural and Earthy: For a more organic and natural vibe, choose earthy tones like beige or sage green. These colors can bring a touch of nature into your shower and create a tranquil ambiance.
- Contrasting Colors: Create visual interest and depth by choosing contrasting colors for different elements in your shower. For example, you could paint the walls a light gray while using a darker shade for the trim or accents. This can add dimension to the space and make it feel more dynamic.

Conclusion
How to paint shower walls can completely transform the look and feel of your bathroom.
You can enhance the space to suit your style and preferences by selecting the right type of paint and color scheme. Be sure to use waterproof or moisture-resistant paint to ensure durability and longevity, given the high-humidity nature of the area. Proper preparation, such as cleaning the walls and applying a primer, is essential for achieving a smooth and lasting finish. Whether you prefer a bold, modern design or a serene, natural ambiance, choosing the right approach will help you create a beautiful and functional shower space.
With careful planning and attention to detail, your painted shower walls can make a lasting impression.

