
Are you tired of your old shower base and want to give it a new look? Painting your shower base is a simple and cost-effective way to update your bathroom’s appearance.

How to paint shower base can be a cost-effective and simple way to refresh the look of your bathroom without undergoing a full renovation. Over time, shower bases can become discolored, scratched, or outdated, and painting offers an excellent solution to restore their appearance. This process requires using the right materials and proper preparation to ensure a long-lasting and durable finish.
With the right steps and a little patience, you can transform your shower base to look like new, enhancing both the aesthetics and functionality of your bathroom.
What Are the Benefits of Painting a Shower Base?
Painting a shower base offers several benefits, making it an attractive option for homeowners looking to update their bathroom without breaking the bank. Some of the advantages include:
- Cost-effective: Replacing a shower base can be expensive and time-consuming, while painting is more affordable and requires minimal effort.
- Customization: By choosing the right type of paint, you can customize your shower base’s color to match your bathroom’s decor.
- Durability: With proper preparation and high-quality materials, a painted shower base can last for years.
- Easy Maintenance: A painted shower base is easy to clean and maintain, making it an ideal choice for busy households.
What Will You Need?
Before getting started, make sure you have the following materials and tools:
- Cleaning Supplies: To properly prepare your shower base for painting, you will need a mild cleaner, a mixture of water and vinegar, and a scrub brush.
- Sandpaper: This will help roughen up the shower base’s surface so that the paint adheres better.
- Primer: A high-quality primer designed for use on surfaces like fiberglass, acrylic or porcelain is essential for ensuring proper adhesion and durability of the paint.
- Paint: Choose a high-quality paint for use in wet areas such as bathrooms. Acrylic or epoxy paints are good options as they are water-resistant and durable.
- Paintbrushes and Rollers: Depending on the size of your shower base, you may need a combination of brushes and rollers to ensure an even coat of paint.
- Painter’s Tape: Use this to protect any areas you don’t want to get painted, such as the walls or fixtures in your bathroom.
9 Easy Steps on How to Paint Shower Base
Step 1. Clean the Shower Base Thoroughly:
Start by thoroughly cleaning the shower base to ensure that all dirt, soap scum, mildew, and grime are removed. Use a mild cleaner or a mixture of water and vinegar with a scrub brush to get into all the grooves and crevices. This step is crucial to ensure the paint adheres properly to the surface.
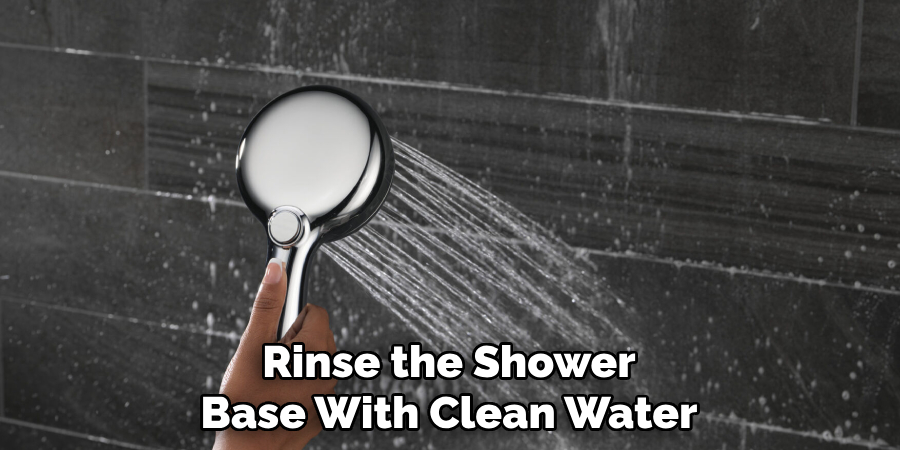
Rinse the shower base with clean water once the cleaning is complete, and then dry it thoroughly with a clean towel or allow it to air dry completely. Any leftover moisture can interfere with the primer and paint application later, so ensure the surface is dehydrated before moving on to the next step.
Step 2. Sand the Surface:
Using fine-grit sandpaper (around 220-grit), gently sand the surface of the shower base to create a slightly rough texture. This step helps the primer and paint adhere better to the surface and ensures a longer-lasting finish. Be thorough but gentle, covering all areas of the base evenly. After sanding, wipe down the surface with a damp cloth to remove dust or particles. Allow the area to dry completely before moving on to the next step.
Step 3. Apply the Primer:
Choose a high-quality bonding primer designed explicitly for slick surfaces, such as acrylic or fiberglass. Carefully follow the manufacturer’s instructions for application. Using a paintbrush or a small roller, apply an even coat of primer to the entire surface of the shower base. Be sure to reach all corners and edges for complete coverage. Allow the primer to dry entirely per the product label’s recommended drying time. This step is vital to ensure a durable and professional-looking finish.
Step 4. Paint the Shower Base:
Once the primer has dried completely, select a high-quality paint suitable for surfaces like acrylic or fiberglass. Epoxy-based paints are often an excellent choice due to their durability and water resistance. Using a clean paintbrush or roller, apply the paint in thin, even layers, ensuring complete coverage of the shower base. Start from one area and work systematically to avoid missing spots.
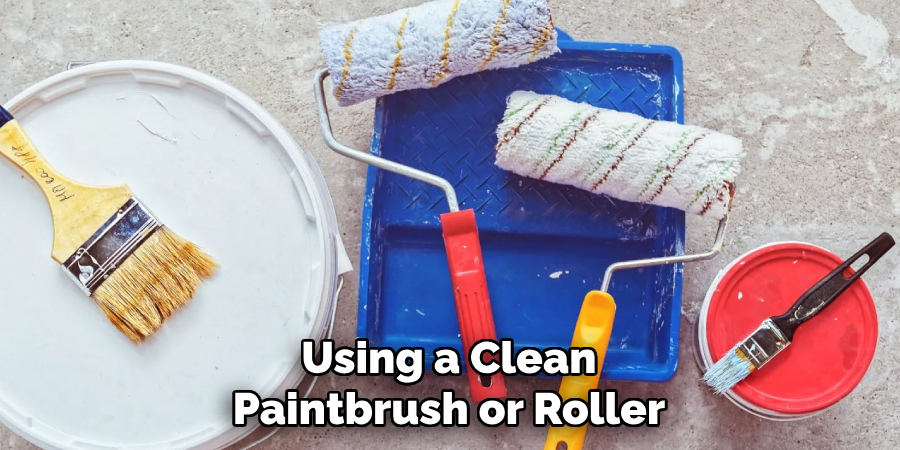
Allow the first coat to dry according to the manufacturer’s instructions before applying a second coat for a smoother and more durable finish. Repeat this process until you achieve the desired opacity and finish. Ensure the final coat is left to cure fully before the shower.
Step 5. Seal the Shower Base:
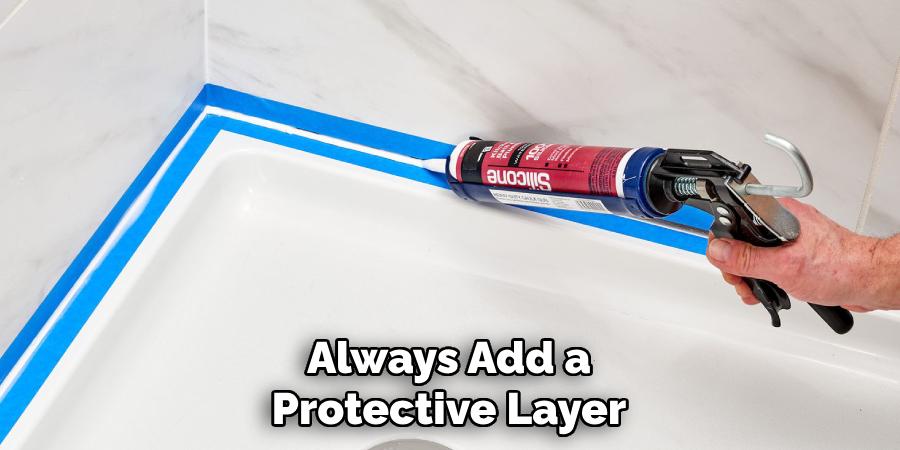
After the final coat of paint has fully cured, apply a waterproof sealant to protect the surface and extend the lifespan of your work. Choose a clear, water-resistant sealant designed for use on painted surfaces. Using a clean brush or applicator, evenly coat the entire surface, ensuring all areas are covered. Pay special attention to corners and edges where water exposure is more likely. Allow the sealant to dry thoroughly as per the manufacturer’s instructions. This final step will ensure that your shower base remains durable, glossy, and resistant to water damage over time.
Step 6. Maintain Your Painted Shower Base:
Regular maintenance is essential to ensure the longevity and appearance of your painted shower base. Clean the surface using a mild, non-abrasive cleaner and a soft sponge or cloth to prevent scratches. Avoid harsh chemicals or heavy-duty cleaning tools, which can damage the paint or sealant. After each use, dry the shower base with a towel or squeegee to minimize water buildup and staining. Periodically inspect the surface for any wear or damage, and reapply the sealant to maintain its waterproof properties. Proper care will keep your shower base looking fresh and functional for years.
Step 7. Final Touches and Inspection:
Once all steps are completed, thoroughly inspect your shower base. Look for any missed spots or uneven areas in the paint job, and touch up as necessary to ensure a smooth, uniform finish. Ensure that the sealant is properly applied and has cured entirely before using the shower. Test the functionality of the shower base by allowing a small amount of water to flow and checking for any leaks or issues. Address any concerns immediately to maintain the integrity of the project. With these final touches, your newly painted shower base is ready for use and will serve as a refreshing upgrade to your bathroom.
Step 8. Keep Safety in Mind:
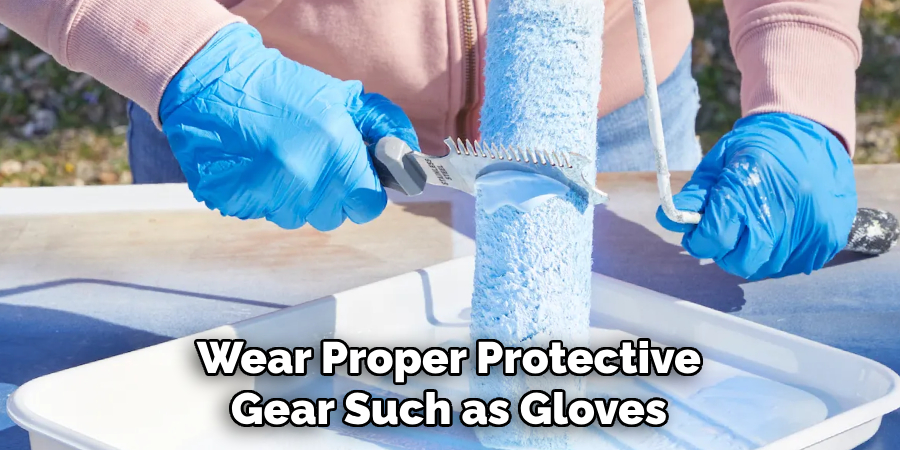
While painting your shower base can be a fun and fulfilling DIY project, it is crucial to prioritize safety. Ensure you are working in a well-ventilated area, and wear proper protective gear such as gloves, goggles, and a mask when handling chemicals or using power tools. Take breaks as needed and follow all product instructions carefully to avoid accidents.
Step 9. Consider Hiring a Professional:
Although painting your shower base can be an exciting DIY endeavor, there are situations where hiring a professional might be the better choice. Professionals have the experience and tools necessary to achieve a flawless finish and can ensure that the materials and techniques are appropriate for your shower base. This is particularly important if you are dealing with structural issues, cracks, or extensive wear that might require more than just a coat of paint.
Additionally, professionals can save you time and effort, especially if you are not confident in your skills or lack the equipment needed for the job. While it may involve a higher upfront cost, hiring a professional can ensure a long-lasting and high-quality result, giving you peace of mind and a bathroom upgrade that stands the test of time.
By following these steps and keeping safety in mind, you can successfully paint your shower base and transform the look of your bathroom.
5 Things You Should Avoid
- Skipping Surface Preparation: Failing to clean and sand the shower base properly can prevent the paint from adhering well. Always ensure the surface is free of soap scum, grime, and any other residues.
- Using the Wrong Type of Paint: Not all paints are suitable for high-moisture environments. Avoid regular wall paints and choose epoxy or waterproof paints for bathroom surfaces.
- Ignoring Ventilation Needs: Painting in an enclosed, poorly ventilated space can be hazardous. Ensure proper ventilation by using exhaust fans or opening windows while you work.
- Rushing the Drying Process: Skipping adequate drying times between paint coats can lead to peeling and a subpar finish. Follow the manufacturer’s guidelines for drying and curing times.
- Skipping a Protective Topcoat: Failing to seal your work with a topcoat can make the paint more prone to chips and wear. Always add a protective layer to ensure durability and longevity of your painted shower base.
Conclusion
How to paint shower base can be a rewarding way to refresh your bathroom’s appearance, but proper preparation and execution are essential for success.
You can achieve a professional and lasting finish by avoiding common mistakes, such as neglecting surface cleaning, using incorrect paint types, or rushing the drying process. Always prioritize adequate ventilation and finish with a protective topcoat to ensure durability.
With patience and attention to detail, your shower base can become a durable and stylish feature in your bathroom.

