
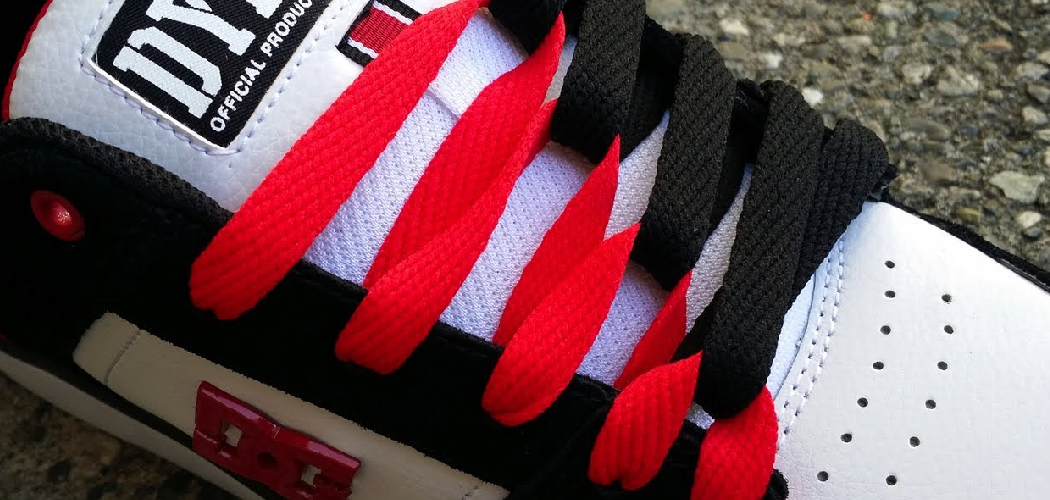
Lacing shoes with two laces is not only a practical method for securing footwear, but it also opens the door to creative and stylish designs. This technique involves using two different laces, often of contrasting colors, to create unique patterns that can personalize your shoes.

Whether you’re looking to make a fashion statement or simply add a pop of color to your outfit, learning this lacing method is both fun and functional. This guide on how to lace shoes with 2 laces will walk you through the steps to master the art of lacing your shoes with two laces.
Why Use 2 Laces?
Before we dive into the lacing process, you may be wondering why use two laces instead of one. The most obvious reason is for aesthetics – using two different colored laces can add a unique touch to your shoes and make them stand out.
However, there are also practical reasons for using two laces. For starters, it allows for custom fit and adjustments on each side of the shoe, making it an ideal method for those with wide or narrow feet. It also provides added stability and support, especially in sports or high-intensity activities.
Materials Needed
To start lacing your shoes with 2 laces, you’ll need:
- Two Pairs of Shoelaces (Preferably in Different Colors)
- A Pair of Shoes With an Even Number of Eyelets
- Your Hands and Fingers (No Tools Required!)
7 Step-by-step Guides on How to Lace Shoes With 2 Laces
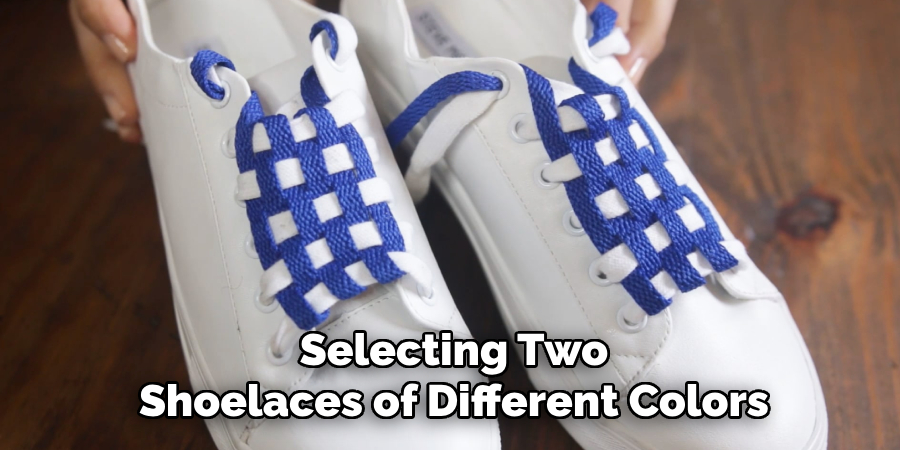
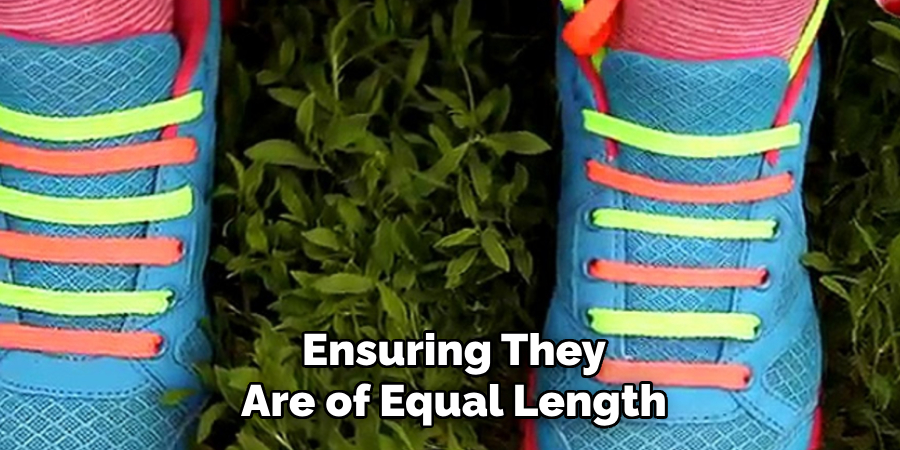
Step 1: Prepare Your Laces
Begin by selecting two shoelaces of different colors or patterns to achieve your desired look. Ensure that both laces are of equal length to prevent uneven lacing. Lay the laces out flat and untangle any knots or twists.
If the laces are frayed at the ends, trim them slightly and use a lighter to carefully seal the tips to make threading easier. Once your laces are ready, you’re set to begin the lacing process.
Step 2: Begin Lacing at the Bottom
Take one lace from your prepared set and feed it through the bottom pair of eyelets, ensuring the lace goes from the outside in. Pull it through evenly so that both ends are of equal length. Next, take the second lace and repeat the process, threading it through the same bottom eyelets but in the opposite direction (inside out).
This creates a layered effect at the bottom and forms the foundation for your two-lace design. Adjust the laces to ensure they lie flat and do not overlap or twist.
Step 3: Cross Over and Thread Through
Take the ends of the first lace and cross them over each other to create an “X”. Thread each end of the lace through the next pair of eyelets from the outside in. Ensure the lace stays flat and untwisted to maintain a neat look.
Next, take the ends of the second lace and repeat the process, crossing them over each other and threading them through the same pair of eyelets, but this time from the inside out. This creates a crisscross pattern with alternating layers that starts to showcase the two-lace design. Adjust the laces as needed to ensure they remain snug and even.
Step 4: Continue the Crisscross Pattern
Repeat step 3 until you reach the top of the shoe, alternating between crossing the laces over each other and threading them through the eyelets in opposite directions. This will create a zigzag pattern that showcases both laces throughout the length of your shoe.
Ensure that both laces are pulled tight with each new crisscross to maintain a snug fit. Adjust as needed to keep the design symmetrical on both sides.
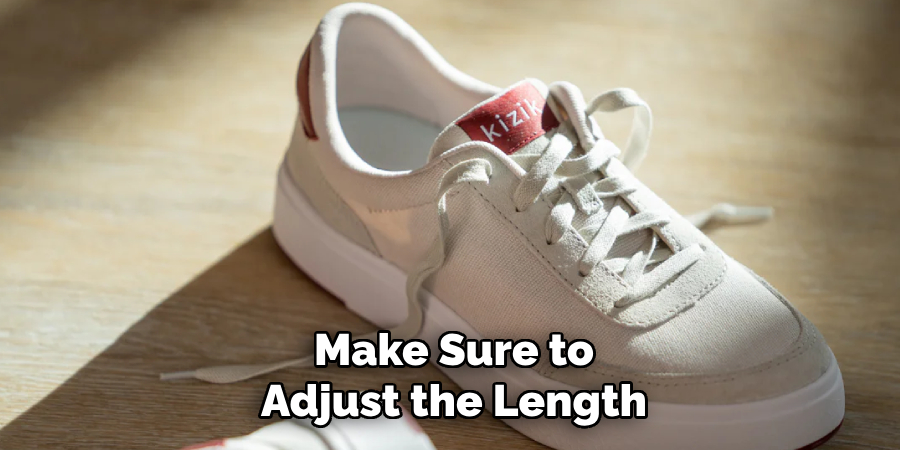
Step 5: Secure at the Top
Once you reach the top pair of eyelets, thread each lace through their respective side from inside towards outside. Take one end of each lace and tie it in a double knot, securing it at the top of the shoe.
Trim off any excess length on both laces and use a lighter to seal the ends if necessary.
Step 6: Repeat for Second Shoe
With the first shoe completed, follow the same steps for the second shoe. Begin by preparing your laces, ensuring they are of equal length and ready to use. Then, replicate the crisscross pattern step-by-step, maintaining the same neatness and symmetry as the first shoe.
Pay attention to keeping the lacing design consistent across both shoes for a cohesive and polished look. Take your time to ensure the second shoe matches the style and fit of the first before securing the knots at the top.
Step 7: Experiment with Different Designs
Now that you’ve mastered the basic technique of lacing shoes with two laces, have fun experimenting with different designs and patterns to create unique looks for your footwear. You can try braiding or weaving the laces together, using different colored laces, or even incorporating beads or charms for added flair.
The possibilities are endless, so let your creativity run wild and make a statement with your laced-up shoes.
Following these 7 simple steps on how to lace shoes with 2 laces, you can easily lace your shoes with two laces and elevate your shoe game. Whether for fashion or function, this lacing method allows for endless possibilities to personalize your footwear and make a statement every step of the way. So go ahead and give it a try – you’ll be sure to turn heads with your stylish and unique laced-up shoes!
Additional Tips for Creative Lacing
Now that you’ve learned the basic technique for lacing shoes with two laces, here are some additional tips to help you get even more creative with your designs:
- Try using laces of different widths or types, such as flat and round laces, to add texture and depth to your design.
- For a more intricate look, thread the laces through every other pair of eyelets on each side instead of every pair. This will create a tighter and more complex crisscross pattern.
- Don’t be afraid to mix and match colors and patterns for an eye-catching and unique look.
- If you have extra long laces, try wrapping them around the shoe before threading them through the eyelets for a stylish detail.
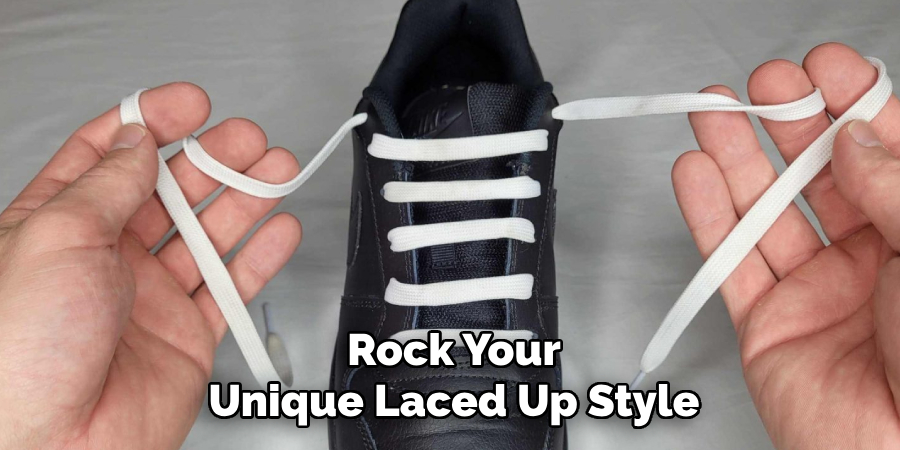
With these tips in mind, you can take your two-lace lacing game to the next level and truly make a statement with your shoes. So go ahead and experiment, have fun, and rock your unique laced-up style! So, this completes our guide on how to lace shoes with 2 laces. We hope you found it helpful and can now confidently add some creative flair to your shoe collection. Happy Lacing!
Frequently Asked Questions
Q: Can I Use Any Type of Shoelace for This Lacing Method?
A: Yes, you can use any type of shoelace as long as they are of equal length and fit through the eyelets of your shoes. The type of laces you choose can also add to the overall look and style of your design.
Q: Is There a Limit to How Many Eyelets I Can Lace With This Method?
A: No, this method can be applied to any shoe with any number of eyelets. However, keep in mind that the more eyelets you have, the longer it may take to complete the lacing process.
Q: How Do I Ensure That My Laced Shoes Stay Tight Throughout The Day?
A: After completing each crisscross pattern, make sure to pull both laces tight before moving on to the next pair of eyelets. This will help maintain a snug fit throughout the day. Additionally, you can double knot the laces at the top for added security.
Q: Can I Lace Different Shoes With 2 Laces?
A: Yes, this method can be used on different types of shoes such as sneakers, boots, and even dress shoes. Just make sure to adjust the length and number of eyelets accordingly for a perfect fit.
Q: How Do I Clean My Laced-Up Shoes?
A: To clean your laced-up shoes, first remove the laces and wash them separately according to their care instructions. For the shoes, use a soft cloth or brush with mild soap and water to gently scrub away any dirt or stains. Allow them to air dry completely before relacing them with your stylish design.
Q: Can I Use This Lacing Method for Both Adults and Children’s Shoes?
A: Yes, this lacing method can be used for both adult and children’s shoes. Just make sure to adjust the length of the laces accordingly for a comfortable fit. With these FAQs, we hope to address any concerns or questions you may have about lacing shoes with 2 laces. Remember to have fun and get creative with your designs!
Conclusion
Lacing shoes with two laces may seem like a daunting task at first, but with these step-by-step instructions on how to lace shoes with 2 laces, you’ll be able to elevate your shoe game in no time. From providing added support and stability to allowing for endless customization options, this lacing technique is both functional and fashionable.
So why settle for plain and traditional lacing when you can make a statement with your shoes? Give this method a try and get ready to turn heads wherever you go. So, grab your laces and start experimenting – the possibilities are endless!