
Installing a shower base liner is an essential step in ensuring a watertight and durable shower setup. A properly installed liner protects your bathroom from water damage and extends the lifespan of your shower. Although the process can seem daunting, with the right tools and a clear set of instructions, it can be completed efficiently, even by those with limited experience in home improvement projects.
This guide will walk you through the steps of how to install a shower base liner, ensuring a secure and professional finish.
Importance of Proper Installation
Proper installation of a shower base liner is critical to the overall functionality and longevity of your shower. A poorly installed liner can lead to leaks, water seepage, and eventual damage to the subfloor and surrounding areas, which may result in costly repairs. Additionally, an improperly fitted liner can compromise the structural integrity of your shower base, increasing the risk of mold and mildew growth due to trapped moisture.
By taking the time to carefully install the liner and following a step-by-step process, you can ensure that your shower remains watertight and durable for years to come. Proper installation not only protects your investment but also enhances the safety and hygiene of your bathroom.
Tools and Materials Needed
Before you begin the installation process, it’s important to gather all the necessary tools and materials. Having everything on hand will make the process smoother and more efficient. Here’s a checklist of what you’ll need:
Tools:
- Utility knife
- Measuring tape
- Level
- Notched trowel
- Rubber mallet
- Screwdriver
- Bucket
- Sponge
- Caulking gun
Materials:
- Shower base liner (preferably PVC or CPE)
- Mortar or thin-set mix
- Waterproof adhesive
- Drain assembly kit
- Silicone caulk
- Waterproof membrane tape
- Protective gloves
- Cleaning supplies (such as rags or paper towels)
Ensure that all tools are in good condition and that the materials are suitable for your specific shower base and bathroom setup. A little preparation can go a long way in ensuring a successful installation.
10 Methods How to Install a Shower Base Liner
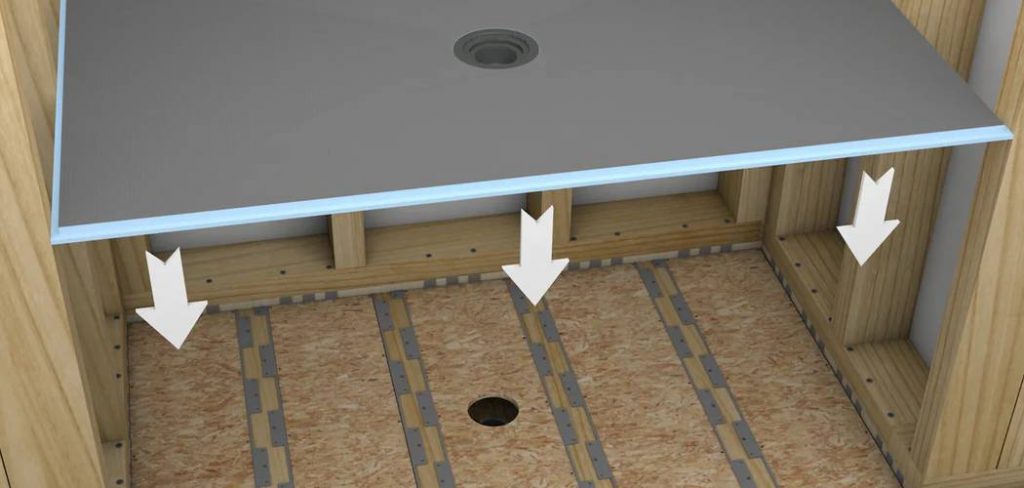
1. Measure and Prepare Your Shower Base
Before jumping into the installation, ensure you have the correct measurements of your shower base. Use a measuring tape to determine the length, width, and depth accurately. Preparing the surface by cleaning and removing any debris or old adhesive residue ensures your liner will adhere seamlessly, giving it a longer usable life.
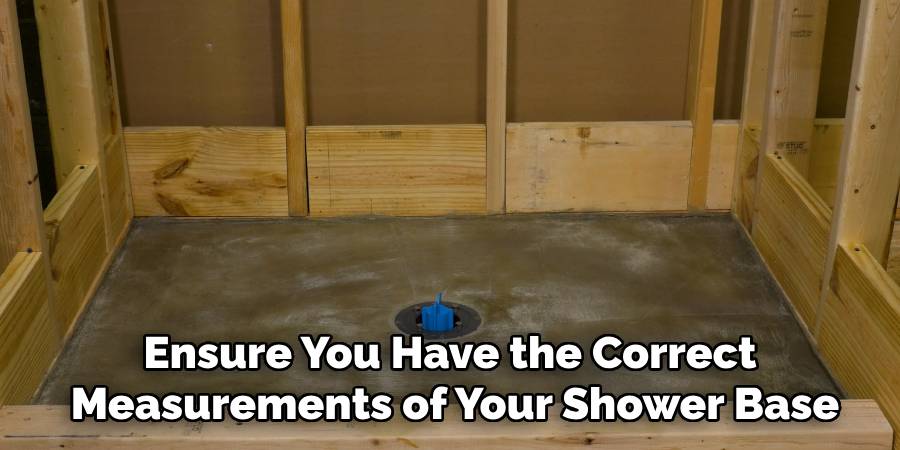
Tip: Double-check your measurements and leave a small allowance for adjustments during installation.
2. Choose the Right Liner Material
Not all liners are created equal. Decide on durable materials like PVC or CPE liners that suit your project’s budget and requirements. PVC liners are known for ease of installation and affordability, while CPE liners boast superior flexibility and environmental friendliness.
Quick Example: Many professionals recommend PVC liners for beginners due to their simple handling process.
3. Gather the Necessary Tools
Having all the tools at hand can save you from frustrating delays. Essential tools include:
- Utility knife
- Staple gun
- Adhesive or sealant
- Trowel
- Measuring tape
Preparation ensures you won’t need to stop mid-project to search for a missing tool.
Pro Tip: Invest in a quality utility knife to make precise cuts when fitting your liner.
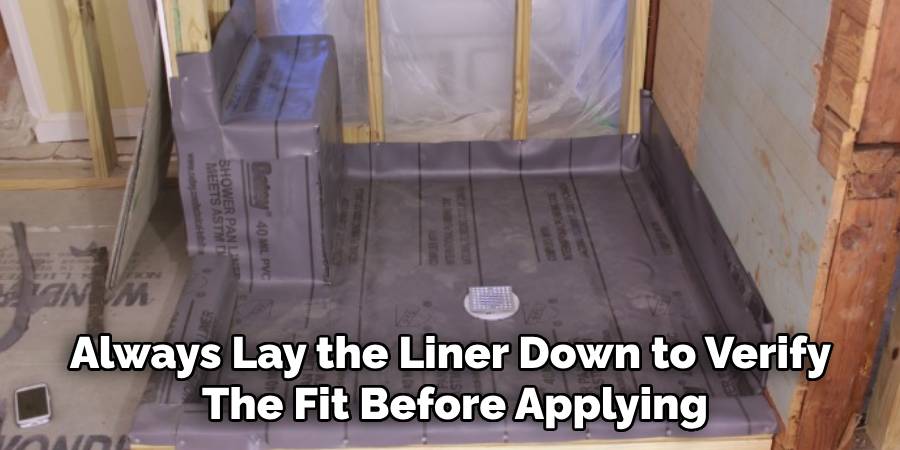
4. Test Fit the Liner Before Securing
Lay the liner over the shower base to test its fit. This step allows you to identify and fix any sizing issues before the adhesive or staples come into play. Ensure there’s enough liner to extend up the shower walls by at least a few inches for additional protection.
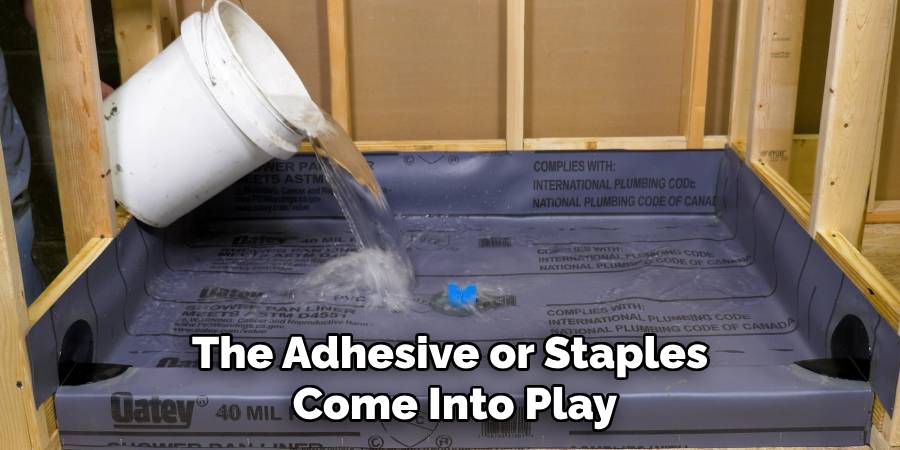
Remember: A dry run can save you time and prevent unnecessary material waste.
5. Apply Adhesive to Anchor the Liner
Use construction adhesive or a waterproof sealant to anchor the liner onto the shower base. Spread the adhesive evenly with a trowel to avoid lumps or bubbles under the liner, which could lead to water stagnation.
Pro Tip: Work quickly but carefully, as most adhesives set within a few minutes.
6. Secure the Liner to the Shower Walls
Using a staple gun, secure the liner to the walls at the edges, ensuring it remains taut without wrinkles. Remember to staple above the height of the shower curb to prevent water leakage.
Tip: Space the staples evenly to avoid weakening the liner and ensure it stays securely in place.
7. Trim Excess Material
Once the liner is secured, trim any excess material around the edges using a sharp utility knife. Be careful not to cut too close to the seals or edges of the base, as this could compromise the liner’s waterproofing abilities.
Attention to Detail: Keep your cuts smooth and steady to avoid tearing the liner.
8. Seal the Corners and Edges
Apply additional adhesive or waterproof sealant to the corners and edges of the shower base. Focus on areas with folds or overlaps to guarantee a watertight seal.
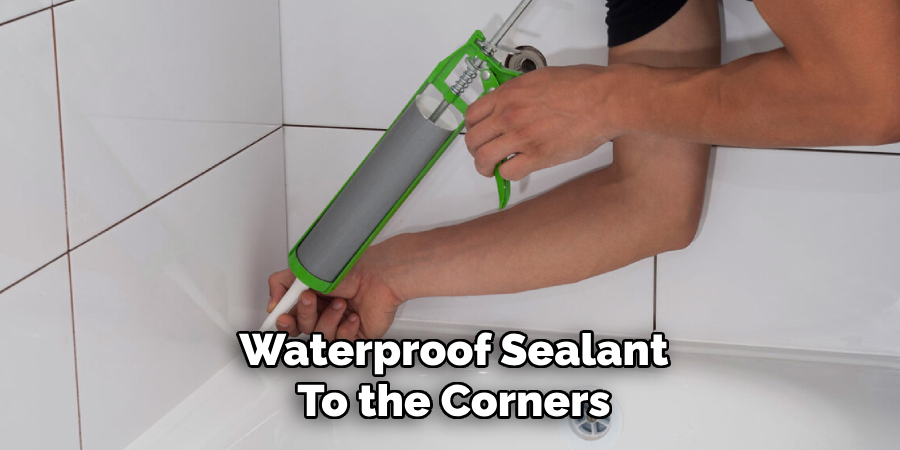
Stat Worth Knowing: According to home improvement experts, corner leaks are among the most common issues in improperly installed liners. A few extra minutes here can save you headaches later.
9. Conduct a Leak Test
Before finishing the installation, conduct a water test by temporarily plugging the drain and filling the shower base with water. Allow it to sit for 24 hours, checking for any leaks or signs of puddles.
Practical Insight: Testing ensures your liner is fully waterproof before moving on to the next stage of your shower renovation.
10. Finish with the Drain Connection
Lastly, connect the liner properly to the shower drain. Cut out a circle in the liner where it aligns with the drain, ensuring it fits tightly around the opening. Use clamps or a drain ring to secure the liner to the drain.
Expert Tip: Apply plumber’s putty or a similar sealant around the drain edges for added protection.
Maintenance and Upkeep
Proper maintenance of your shower base liner is essential to ensure its longevity and prevent issues such as leaks or mold growth. Here are a few tips to keep your liner in top condition:
- Regular Cleaning: Clean the shower base regularly with non-abrasive cleaners to remove soap scum, dirt, and mildew. Avoid using harsh chemicals that could damage the liner material.
- Inspect for Damage: Periodically inspect the liner for any signs of wear, tears, or cracks. Address any issues immediately to prevent water damage to the underlying structure.
- Reinforce Seals: Check the seals around the edges, corners, and drain connection for signs of wear or deterioration. Reseal these areas with waterproof adhesive or silicone caulk as needed.
- Ensure Proper Drainage: Keep the drain clear of hair, soap, and debris to prevent water from backing up. A clogged drain can lead to standing water, which may compromise the liner over time.
- Monitor for Leaks: Conduct an occasional water test, similar to the initial leak test, to ensure your liner remains watertight. Early detection of leaks can save you from costly repairs.
By incorporating these simple upkeep routines as part of your cleaning schedule, you can extend the life of your shower base liner and maintain a functional, watertight shower environment for years to come.
Common Mistakes to Avoid
When installing a shower base liner, avoiding common errors can save time, money, and frustration. Here are some frequent mistakes and how to prevent them:
1. Skipping Surface Preparation
Failing to clean and prep the surface properly before installation can result in poor adhesion and a compromised fit. Ensure all debris, old adhesive, and imperfections are removed to provide a smooth and clean base for the liner.
2. Incorrect Measurements
Underestimating or overestimating dimensions can lead to an ill-fitting liner, which can cause leaks and wasted material. Always measure multiple times and leave a small allowance for adjustments during installation.
3. Using the Wrong Tools or Materials
Opting for subpar materials or tools can compromise the durability of the liner. For example, using dull cutting tools or the wrong type of adhesive can lead to uneven cuts, bubbles, or poor sealing. Invest in quality tools and materials specific to your project needs.
4. Failing to Test Fit the Liner
Skipping the test-fit step can result in surprises later in the process, such as misalignment or insufficient liner coverage. Always lay the liner down to verify the fit before applying adhesive or securing it.
5. Neglecting to Smooth Out Wrinkles
Wrinkles and folds in the liner can disrupt drainage and lead to water pooling. Take the time to smooth out the liner during installation, ensuring it is taut and free of creases.
6. Improper Drain Seal Installation
One of the most critical areas of the liner is the drain connection. Cutting the liner too wide or failing to secure it properly to the drain can cause leaks and water damage. Carefully align and seal the liner tightly around the drain.
7. Overlooking Corner and Edge Sealing
Corners and edges are vulnerable spots for water leakage. Failing to apply sufficient adhesive or sealant in these areas can lead to weak points in your waterproofing. Take extra care to reinforce these sections.
Conclusion
Installing a shower base liner requires careful preparation, precise execution, and attention to detail to ensure a long-lasting, waterproof foundation for your shower. By following the step-by-step installation process, conducting thorough leak tests, and avoiding common pitfalls, you can achieve a professional-quality result that stands the test of time.
Additionally, incorporating regular maintenance practices will help protect your liner from wear and tear, ensuring a functional and problem-free shower for years to come. Thanks for reading our blog post on how to install a shower base liner! We hope you found it helpful and informative.

