
Adding a bench to your shower can significantly enhance its functionality and comfort. Whether you’re looking to create a relaxing space for seated bathing or a practical spot for grooming tasks, a shower bench is a versatile addition.
Building a bench in your shower requires careful planning, the right materials, and some basic craftsmanship, but the process is straightforward with the right guidance. This guide will walk you through everything you need to know about how to build a bench in a shower.
Benefits of Adding a Shower Bench
A shower bench offers several advantages that enhance both the functionality and comfort of your shower space. First and foremost, it provides a safe, secure seating option, especially beneficial for individuals with limited mobility or those recovering from injuries. It allows for a more relaxing bathing experience, enabling tasks like shaving, exfoliating, or simply resting. Additionally, a bench can serve as extra storage space for toiletries, keeping your shower area organized.
Aesthetically, a well-designed bench can elevate the overall look of your bathroom, adding a touch of luxury and sophistication. Overall, it’s an investment that combines practicality, safety, and style in one feature.
Different Types of Shower Benches
When considering adding a bench to your shower, understanding the different types available will help you choose the one that best suits your needs and space. Here are the main types of shower benches:
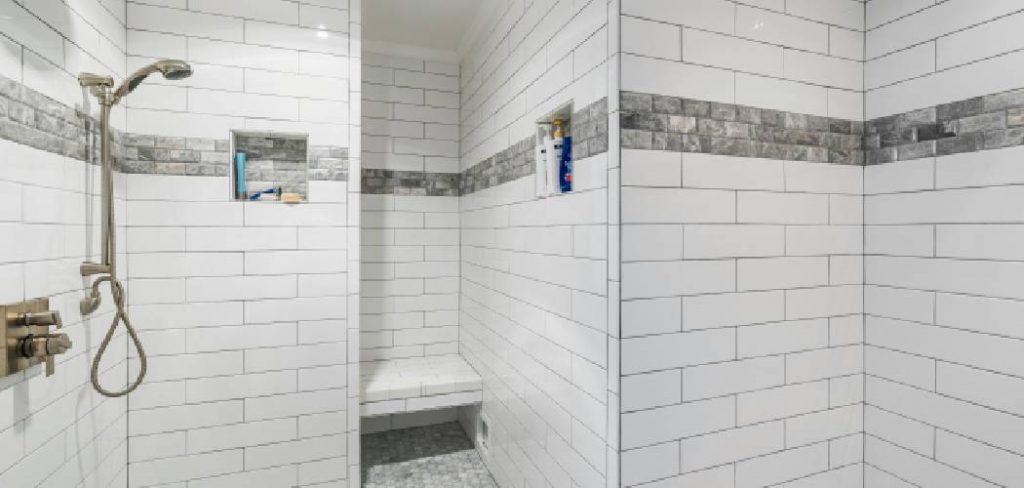
1. Built-In Bench
A built-in bench is a permanent addition to your shower, constructed as part of the tiling or shower wall. These benches are sturdy, customizable in size and shape, and seamlessly integrated into the overall design. They are ideal for those seeking a long-term and aesthetically cohesive solution.
2. Floating Bench
A floating bench is mounted directly onto the shower wall without any floor supports, giving it a sleek and modern appearance. This option is excellent for smaller showers because it takes up minimal visual and physical space while still providing functionality.
3. Portable Shower Bench
Portable shower benches are freestanding and can be easily moved in and out of the shower as needed. They are typically made from plastic, teak, or aluminum, making them lightweight yet durable. These are perfect for those who want flexibility or do not wish to commit to a permanent structure.

4. Corner Bench
Corner benches are designed to fit snugly into the corner of the shower, making efficient use of space. They can be built-in or added as a portable option, offering a compact yet comfortable seating solution.
Each type of bench has its advantages depending on your style preferences, shower layout, and functional requirements. Selecting the right type will ensure your shower bench enhances both the practicality and design of your bathroom.
10 Methods How to Build a Bench in a Shower
1. Built-In Bench with Tile
A built-in, tiled bench is the most popular option for its seamless look. Start by constructing a frame from waterproof materials such as cement board or concrete blocks. Once secured, cover the frame with tiles that match or complement your shower walls and floor. Use waterproof grout to ensure no water seeps through. This method is durable, aesthetically pleasing, and easy to clean.
2. Floating Bench
For a modern and minimalist look, consider a floating bench. Made with sturdy materials like natural stone or thick hardwood, this bench is mounted directly to the shower wall without any supporting legs. To install, use heavy-duty wall brackets designed to withstand significant weight. Ensure that the wall structure can handle the stress—this method works especially well with reinforced concrete or stud walls.
3. Prefab Shower Benches
If you’re less of a DIY enthusiast, pre-made shower benches are a great option. These benches come ready to install and are available in various materials, including teak, acrylic, and granite. Just ensure proper sealing and positioning to integrate smoothly into your existing shower area.

4. Concrete Shower Bench
Concrete benches offer unmatched durability and a clean, industrial aesthetic. You can pour concrete directly into a custom mold built onsite or use pre-cast concrete slabs. Always seal the finished bench with a waterproofing agent to prevent moisture absorption and extend its lifespan.
5. Teak Wood Bench
For a movable, luxurious touch, a teak wood bench is highly resistant to water, making it a practical option. Rest it in your shower for extra seating or foot support as needed. Just make sure to clean and oil the wood periodically to maintain its durability.
6. Corner Bench Installation
A corner bench is an excellent option for smaller showers where space is limited. Build a triangular frame out of waterproof plywood or concrete board, then tile over the structure. It provides a space-saving solution that doesn’t sacrifice comfort or style.
7. Fold-Down Shower Bench
For those with accessibility concerns or compact showers, a fold-down bench is a fantastic choice. These are typically made of stainless steel hardware and waterproof wood or composite slats. Mount the bench securely to the wall, allowing it to fold up against the wall when not in use, providing ultimate flexibility.
8. Cement Board and Tile Combination
Create a sturdy bench using cement backer board as a base material. First, construct the bench’s frame with waterproof plywood or bricks, cover it with cement board, and then finish with your choice of tiles. This method offers a smooth, finished appearance with strong durability.
9. Stone Slab Bench
Elevate the look of your shower with a stone slab bench. Options like marble, granite, or quartz provide a high-end feel and require minimal maintenance over time. The slab is typically supported on both ends by either the shower walls or custom brackets.

10. Built into the Shower Wall
This method incorporates the bench into the shower’s existing wall structure, resulting in a streamlined and sleek design. Work directly with a contractor to extend the wall outward and create a niche for the bench. Use tiles or stones that match the wall for a cohesive look.
Maintenance and Upkeep
Proper maintenance ensures your shower bench remains functional and visually appealing for years to come. Here are some practical tips to care for your shower bench based on its material:
- Tiled Benches: Regularly clean the tiles and grout lines with a non-abrasive cleaner to prevent mold and mildew buildup. Reseal the grout annually to maintain its waterproof properties.
- Teak Wood Benches: Clean with a mild soap and water solution, and dry thoroughly to avoid water stains. Apply teak oil periodically to preserve the wood’s natural resistance to moisture and maintain its luxurious look.
- Stone Benches: Wipe down the surface after each use to prevent water spots and soap scum. Use a specialized stone cleaner, and reseal the surface every 1-2 years to protect it from moisture damage.
- Concrete Benches: Seal the concrete as recommended by the manufacturer to avoid porous surface issues. Clean with a gentle cleanser to keep it looking fresh and free of stains.
- Metal and Composite Benches: Wipe down with a soft cloth and mild detergent after use to prevent rust or discoloration over time. For fold-down benches, regularly check the hardware to ensure it stays secure and functional.
By incorporating these maintenance practices into your routine, you can prolong the lifespan and durability of your shower bench while keeping it safe and hygienic.
Safety Considerations
When installing or using a shower bench, ensuring safety is paramount. Here are key safety considerations to keep in mind:
- Weight Capacity: Always verify the weight capacity of your shower bench, particularly if it’s a floating or fold-down design. Ensure the brackets and wall mounts are securely installed and capable of handling the expected load.
- Non-Slip Surfaces: Choose materials with a textured or non-slip surface to reduce the risk of slipping when the bench is wet. For tiled benches, consider using slip-resistant tiles or adding non-slip strips.
- Proper Sealing: Waterproofing is essential to prevent water from seeping into the shower bench, which can lead to structural damage or mold growth. Always use high-quality waterproofing materials and reseal the bench periodically.
- Secure Installations: If the bench is built into the wall or uses brackets, ensure it is properly secured during installation. Reinforce walls as needed to support additional weight and stress.
- Rounded Edges: Avoid sharp corners or edges on the bench, as they can cause injuries in the confined space of a shower. Opt for rounded edges or sand sharp corners down for a safer design.
- Accessibility: If the bench is intended for individuals with limited mobility, ensure it complies with ADA (Americans with Disabilities Act) standards. Position it at an appropriate height and consider including grab bars for added stability.
- Regular Inspections: Periodically check for signs of wear, rust, or structural instability. For fold-down benches, inspect hinges and mounting hardware to confirm they remain secure and functional.

By addressing these safety considerations, you can create a shower bench that is not only stylish and comfortable but also safe and reliable for everyday use.
Conclusion
A shower bench is a versatile addition to any bathroom, offering enhanced functionality, comfort, and style. Whether you choose a built-in design, a fold-down option, or a luxurious stone slab bench, there are numerous possibilities to suit your space and preferences.
By ensuring proper installation, maintenance, and safety precautions, you can enjoy the benefits of a durable and aesthetically pleasing bench for years to come. Thanks for reading our blog post on how to build a bench in a shower! We hope you found it helpful and informative.

